Well, we all are in a hurry—especially in our projects—to get them ready to show the world how great of a developer we are, all while neglecting an essential aspect of the whole process: the commits using version control systems!
Having a good commit history is as important as writing good quality documented code. Believe me, in the future, you will thank yourself if you implement them both in your projects.
The Problem
Look carefully and try to understand the difference between these two commit histories:
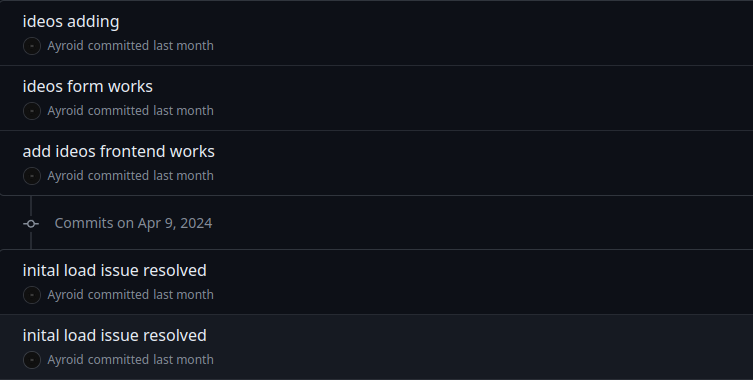 Commit history - Before
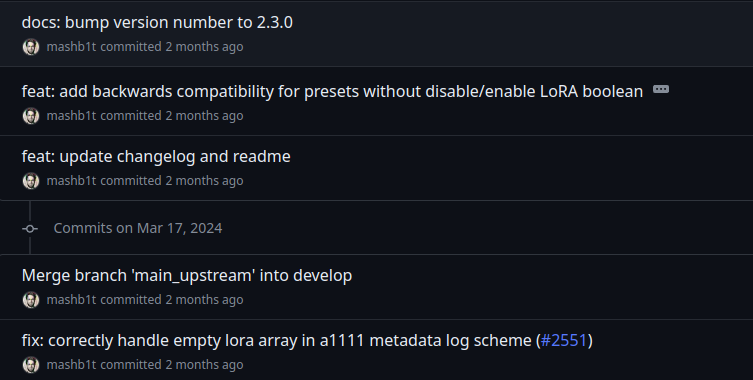 Commit history - After
Both commit histories would seem okay to a novice eye, but an experienced dev knows how much better and more useful the second one is. We see a better description of what happened in that commit—whether it was a feature added, docs updated, or any bug fix.
Of course, now you may be curious how we transition from the first commit history to the better second one. Let's understand the same!
The Solution
The commit pattern we observe in the second commit history is known as Conventional Commits, which is a lightweight convention on top of commit messages, providing rules for creating such commit history.
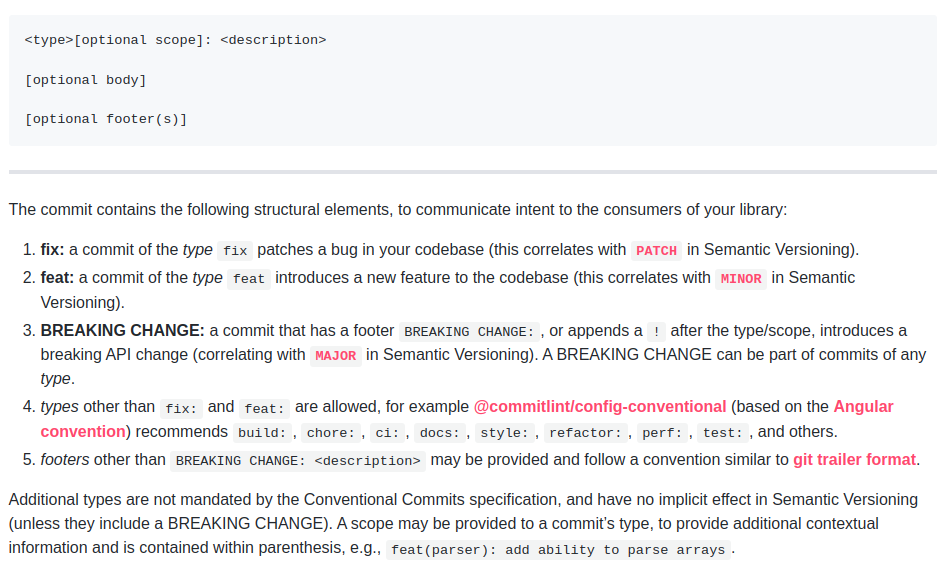 Conventional Commits Specification
The above image is a screenshot from the Conventional Commit Docs explaining everything we need to know—but who wants to go through the pain of understanding and then implementing it yourself?
There's a tool called Commitizen that makes the job easy for us! It provides a CLI-based commit writing method taking in all the inputs required for a standard conventional commit to ensure a better commit history.
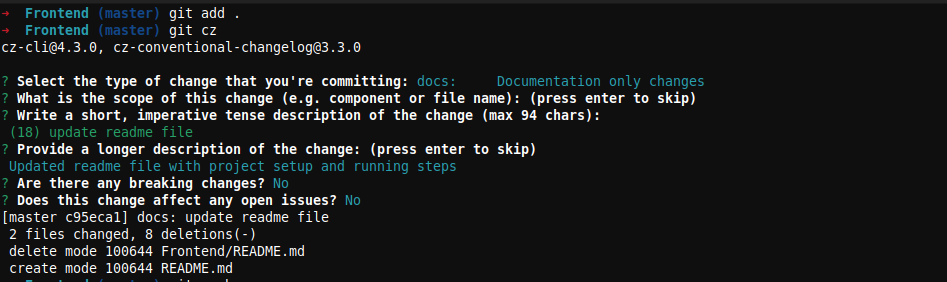 Commitizen CLI
 Commitizen Output
Setting up Commitizen
Follow the given steps to set up Commitizen for your projects.
Step 1: Install Git
If you haven't already, install Git on your system. You can download it from the official website: Git Downloads.
Step 2: Initialize a Git Repository
Navigate to your project directory in your terminal and initialize a new Git repository:
git initStep 3: Install Commitizen
Commitizen is a command-line tool that helps you create conventional commit messages. Install it globally using npm:
npm install -g commitizenStep 4: Setting up Commitizen in Your Repository
Move inside your project's root directory and use the below command to initialize your project to use the cz-conventional-changelog adapter:
commitizen init cz-conventional-changelog --save-dev --save-exactAlso, add the config.commitizen key to the root of your package.json file:
"config": {
"commitizen": {
"path": "cz-conventional-changelog"
}
}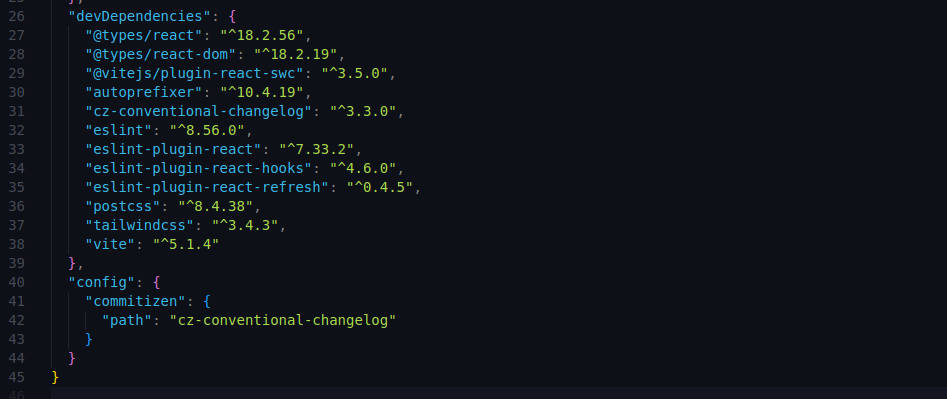 Package.json Configuration
Step 5: Using Commitizen
Use git cz instead of git commit to use Commitizen to structure your commits:
git add .
git cz
Commitizen Interactive
Commitizen Result
Thank you for reading the blog. I'd love to hear your thoughts and insights, so feel free to share your comments. Don't forget to hit the follow button to stay tuned for more lessons learned and experiences in the development world.
Happy learning!